Local development
Using your browser, the interactive tutorials are great for learning m2c2kit, and the playground lets you quickly try ideas. But experienced programmers will usually install the full development tools on their local machine.
After installing the m2c2kit CLI, you can use it to quickly:
- scaffold new assessments
- edit, run, and debug assessments in VS Code
Scaffold new assessments with the m2c2kit CLI
The m2c2kit CLI quickly scaffolds a demo app and serves it on your local machine.
m2 new myapp
cd myapp
npm run serve
📦 Authoring an assessment for distribution as a package? (advanced)
If you are creating an assessment that will be uploaded to a registry (public or private) as a package and reused as a module in other studies, use the --module option:
m2 new myapp --module
This adds some additional code, configuration, and build steps specific to m2c2kit assessment packages.
You can now browse to http://localhost:3000 to view the demo app.
Always use the m2c2kit CLI to begin a new assessment, because it will scaffold an app with code following current m2c2kit "best practices."
On Windows, the first time you serve files with node, you may be asked to allow Node.js access to private and public networks. Enable both and click "Allow Access":

😕 Problems?
If you saw error messages after you typed m2 new myapp, make sure you installed the CLI. Then, make sure you are not in a special, protected directory. For example, on Windows, the command line prompt might start in c:\windows or c:\, which you may not be able to write to. Try this:
mkdir c:\m2c2kit

cd c:\m2c2kit

m2 new myapp

cd myapp

npm run serve
Edit, run, and debug assessments in Visual Studio Code
Visual Studio Code (VS Code) is a great editor for local m2c2kit development, and the CLI configures your app code to work with it.
After creating your app with the CLI, open your app in VS Code (code . opens the current folder in VS Code):
cd myapp
code .
If you are asked, "Do you trust the authors of the files in this folder?", click "Yes."
You can run NPM scripts directly in VS Code if you show the NPM Scripts explorer. Click the three dots in the upper right of the file explorer, and select "NPM Scripts":

The NPM Scripts explorer is now visible.
Running your app
To build and serve the app, in the NPM Scripts explorer click the triangle in the "serve" script:
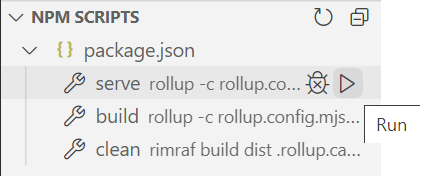
This serves the app locally on your computer.
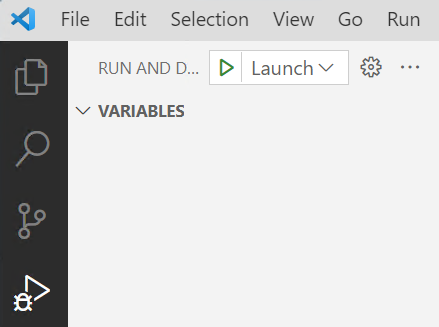
To run the app in debug mode, show the Debug panel by clicking on the triangle with a bug on it. Then, click the launch button (green triangle). This will open a new browser window with the app running in debug mode:
Note: the m2c2kit CLI configured VS Code to use the Chrome debugger. If Chrome is not installed, the launch will fail. To use a different browser, edit the launch.json file in the .vscode folder: For Edge, set the type to msedge. For Firefox, install the Debugger for Firefox and follow the instructions to edit launch.json.
Watch mode
The "serve" script automatically rebuilds your app when you save changes to your code ("watch mode").
In the example below, we launch the app. Then, in the file index.ts we change the heading on the first instructions page from "myapp" to "myapp is great". As soon as the file is saved, the app is rebuilt and reloaded in the browser: